9 Practical Ways How to Build a Cold Frame
Damp earth releases a sharp, geosmin-rich scent when the first thaw begins; meanwhile, the turgor pressure in a hardened seedling determines whether it survives a late-season frost or succumbs to cellular collapse. Understanding how to build a cold frame is the difference between a four-month growing season and a year-round harvest. This structure acts as a passive solar collector, trapping thermal energy to elevate ambient temperatures by 10 to 20 degrees Fahrenheit. It creates a microclimate where the rhizosphere remains active even when the surrounding topsoil is frozen solid. By mastering the physics of light transmission and thermal mass, you can maintain photosynthetic activity during the shortest photoperiods of the year.
Materials:

The foundation of a successful cold frame is not just the enclosure but the substrate within. You require a **friable loam** with a high Cation Exchange Capacity (CEC) to ensure nutrient availability. Aim for a soil pH between **6.2 and 6.8** for optimal mineral solubility. The NPK ratio for the initial bedding should be a balanced **10-10-10** or a slightly nitrogen-heavy **5-3-3** if you are overwintering leafy greens.
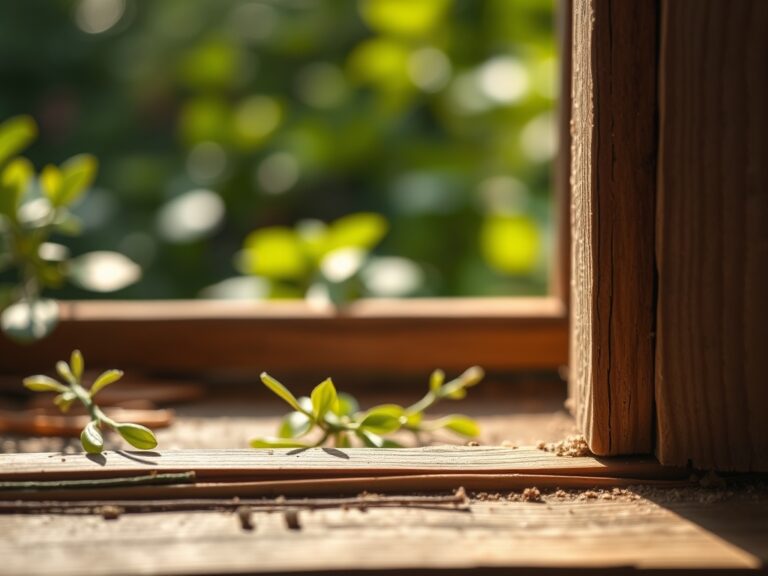
Physical materials must include rot-resistant wood like cedar or black locust. Avoid pressure-treated lumber that may leach heavy metals into the soil. For the glazing, use double-walled polycarbonate or reclaimed glass windows. Polycarbonate provides superior insulation with an R-value of approximately 1.5 to 2.0, whereas single-pane glass offers better light transmission but poor heat retention. You will also need a soil moisture meter and a digital thermometer with a remote probe to monitor the internal environment without opening the lid.
Timing:
Timing is dictated by your USDA Hardiness Zone and the specific frost dates of your microclimate. In Zones 5 through 7, construction and soil preparation should be finalized by late September. This allows the soil to capture the final weeks of intense solar radiation before the winter solstice. The biological clock of the plant transitions from vegetative growth to a state of semi-dormancy as day length drops below 10 hours, a phenomenon known as the Persephone Period.
During this phase, metabolic rates slow significantly. You are not looking for rapid biomass accumulation but rather the maintenance of existing cellular structures. If you are starting spring crops, aim to sow seeds 6 to 8 weeks before the last expected frost. The cold frame allows for "hardening off," a process that thickens the waxy cuticle on leaves and prevents transplant shock by gradually exposing seedlings to fluctuating temperatures and UV radiation.
Phases:

Sowing
Direct sow seeds into the frame once the internal soil temperature reaches a consistent 45 degrees Fahrenheit. Use a hori-hori knife to create shallow furrows. Space seeds according to their mature diameter to ensure adequate airflow and prevent fungal pathogens from colonizing the damp microclimate.
Pro-Tip: Monitor the photoperiod. Plants require a minimum of 10 hours of light to sustain active growth. If light levels fall below this, the plant enters a state of quiescence where respiration exceeds photosynthesis; leading to a depletion of stored carbohydrates.
Transplanting
When moving seedlings into the frame, ensure the root ball is saturated to maintain turgor pressure. Dig a hole twice the width of the root system. Place the plant at the same depth it was in its previous container to avoid stem rot.
Pro-Tip: Inoculate the planting hole with mycorrhizal fungi. This symbiotic relationship increases the surface area of the root system; allowing the plant to access phosphorus and micronutrients that would otherwise be immobile in cold, damp soils.
Establishing
Once transplanted, the focus shifts to moisture management. Use a soil moisture meter to ensure the substrate remains at 60% to 70% field capacity. Over-watering in a cold frame is a primary cause of root senescence due to anaerobic conditions.
Pro-Tip: Control auxin suppression by pinching back the apical meristems of leggy plants. This redirects hormonal flow to lateral buds; encouraging a bushier growth habit that is more resilient to the physical weight of potential frost or condensation.
The Clinic:
Physiological disorders in a cold frame often stem from poor ventilation or nutrient imbalances.
- Symptom: Yellowing of lower leaves (Chlorosis).
- Solution: This typically indicates Nitrogen deficiency.
- Fix-It: Apply a water-soluble fish emulsion with a 5-1-1 NPK ratio to provide immediate bioavailability.
- Symptom: Purpling of stems and leaf undersides.
- Solution: This is a sign of Phosphorus deficiency, often caused by cold soil temperatures (below 50 degrees Fahrenheit) which lock out phosphorus.
- Fix-It: Increase thermal mass inside the frame using black water jugs to stabilize soil temps.
- Symptom: Damping-off (seedlings collapsing at the base).
- Solution: Fungal pathogens like Pythium thriving in high humidity.
- Fix-It: Increase ventilation by propping the lid open 2 to 4 inches during the day when ambient temps exceed 40 degrees Fahrenheit.
- Symptom: Tip burn on new growth.
- Solution: Calcium deficiency caused by inconsistent transpiration rates.
- Fix-It: Ensure consistent moisture levels and use a fan or manual venting to move air; which assists the plant in pulling calcium through the xylem.
Maintenance:
Effective maintenance requires precision. Provide exactly 1.5 inches of water per week at the drip line of the plants. Use bypass pruners to remove any necrotic tissue immediately; as decaying organic matter is a vector for Botrytis. During peak winter, clear snow from the glazing within 4 hours of a storm to prevent light deprivation.
Monitor the internal temperature daily. If the temperature exceeds 75 degrees Fahrenheit, you must vent the frame. High heat in a confined space causes rapid transpiration, leading to permanent wilting point if the roots cannot keep up with the moisture demand. Use a soil moisture meter to check the depth of hydration; the top 2 inches should feel like a wrung-out sponge.
The Yield:
Harvesting from a cold frame requires a delicate touch to avoid damaging the crown of the plant. For leafy greens, use the "cut and come again" method, removing only the outer leaves with sharp shears. This leaves the central meristem intact for continued production.
Harvest in the early morning when turgor pressure is at its peak. This ensures the cell walls are fully hydrated, providing the crispest texture. For "day-one" freshness, immediately submerge harvested greens in 40-degree Fahrenheit water to remove field heat and slow the rate of respiration. This process, known as hydro-cooling, extends the shelf life by preventing the rapid breakdown of sugars and volatile oils.
FAQ:
What is the best orientation for a cold frame?
Orient the frame toward the South to maximize solar radiation. A slope of 30 to 45 degrees on the glazing allows for optimal light penetration during the winter months when the sun is lower on the horizon.
How do I prevent overheating in the spring?
Install an automatic vent opener that utilizes a wax-filled cylinder. The wax expands as temperatures rise; physically pushing the lid open once the internal environment reaches a set threshold, typically 70 degrees Fahrenheit.
Can I use a cold frame in the summer?
Yes, by replacing the glass with shade cloth. This reduces light intensity and lowers the internal temperature by 10 to 15 degrees; allowing you to grow cool-season crops like spinach or cilantro during high-heat months.
What is the ideal thickness for the frame walls?
Use lumber at least 1.5 to 2 inches thick. Thicker walls provide a higher thermal mass and better insulation; which is critical for maintaining stable soil temperatures during extreme nocturnal temperature drops in northern climates.