8 Simple Ways How to Use Humidity Domes
Seedlings collapse overnight when moisture escapes too quickly from tender leaves. The transparent barrier of a humidity dome creates a microclimate where relative humidity reaches 80-95%, allowing delicate cotyledons to harden off without desiccation stress. Learning how to use humidity domes correctly determines whether your propagation efforts yield vigorous transplants or leggy, fungus-prone failures that never establish proper root architecture.
Materials
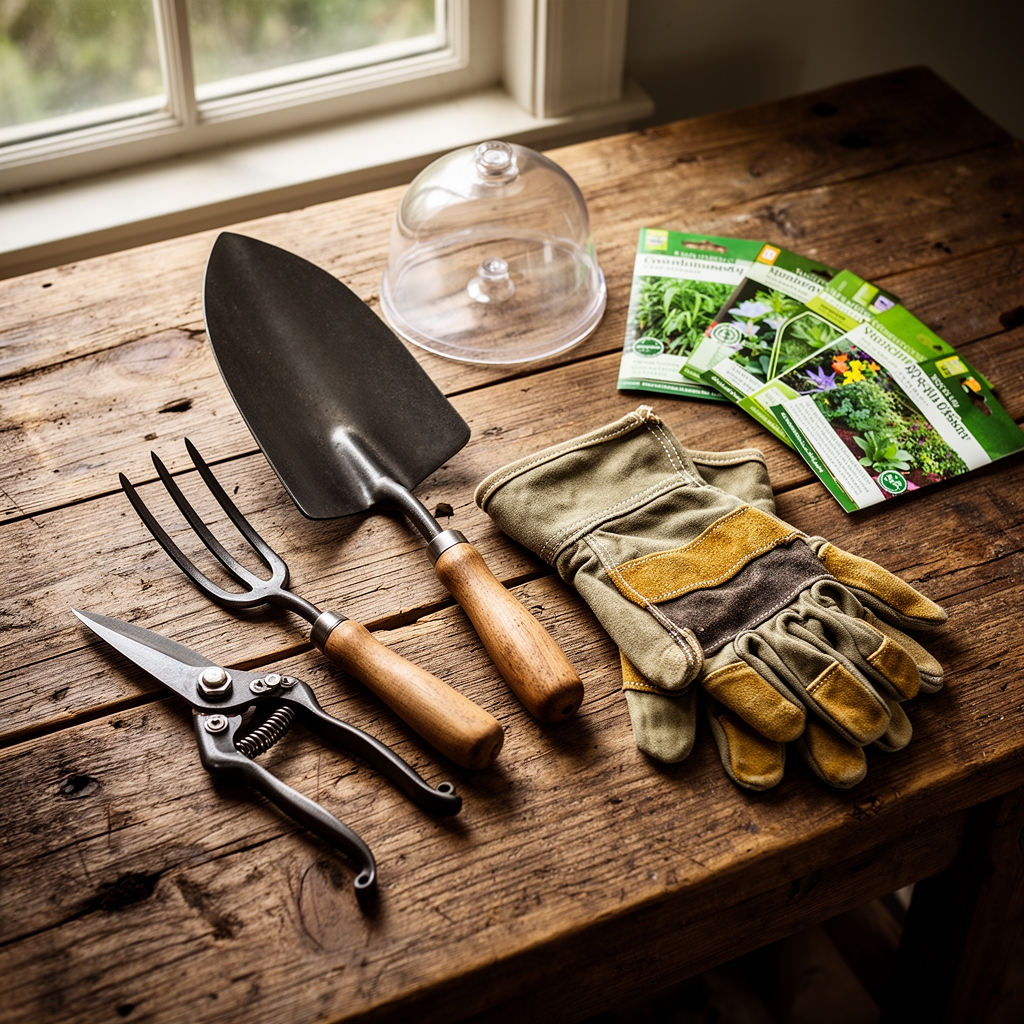
Select domes constructed from food-grade polyethylene or rigid polycarbonate, measuring 7-11 inches in height to accommodate vertical growth during the 10-14 day acclimation period. Adjustable vents in the dome apex regulate air exchange and prevent anaerobic conditions that favor damping-off pathogens.
Pair domes with standard 1020 flats (10 x 20 inches) filled with soilless propagation mix at pH 5.8-6.3. The substrate should contain 50% Canadian sphagnum peat, 30% perlite (horticultural grade, 3-4mm particle size), and 20% composted bark fines. Incorporate mycorrhizal fungi inoculant (Glomus intraradices) at 0.5 ounces per cubic foot to colonize emerging root hairs within 72 hours.
Apply starter fertilizer at 1-2-1 NPK ratio, diluted to 100 ppm nitrogen for initial moisture saturation. Avoid calcium nitrate formulations under domes, as rapid atmospheric nitrogen cycling encourages excessive vegetative stretch. Use fish emulsion or kelp extracts containing naturally chelated trace minerals instead.
Bottom heat mats maintain substrate temperature at 72-78°F, accelerating germination by 30-40% compared to ambient conditions. Digital thermostats prevent temperature spikes above 82°F that denature proteins in radicle tissue.
Timing
Deploy humidity domes 6-8 weeks before the last expected frost date in USDA Hardiness Zones 3-7, and 8-10 weeks before transplant windows in Zones 8-11. This schedule aligns auxin distribution with photoperiod extension as natural daylight increases.
Begin propagation when soil temperatures outdoors stabilize above 50°F at 4-inch depth. This correlation ensures that dome-raised seedlings experience minimal transplant shock when root systems encounter field conditions.
For fall crops in Mediterranean climates (Zones 9-10), initiate dome use in late July through August when ambient humidity drops below 40%. The controlled environment compensates for atmospheric moisture deficits during hot, dry propagation periods.
Phases

Sowing Phase (Days 0-5): Saturate propagation mix to field capacity, allowing 20% of applied water to drain from flat perforations. Sow seeds at species-specific depths, typically 2-3 times seed diameter. Secure dome immediately, keeping vents fully closed to maintain 95% relative humidity.
Monitor condensation patterns on interior dome surfaces. Uniform fog coverage indicates proper moisture equilibrium. Large water droplets signal excessive humidity; crack vents 10% to increase air exchange.
Pro-Tip: Dust seeds with powdered sulfur at 0.5 grams per 100 seeds before sowing. This fungistatic treatment suppresses Pythium and Rhizoctonia without disrupting beneficial microbial populations.
Transplanting Phase (Days 6-10): Once cotyledons fully expand and first true leaves emerge, open vents 25% to introduce gradual desiccation stress. This controlled water deficit triggers lateral root branching and increases root:shoot ratio from 1:3 to 1:2.
Reduce bottom heat to 68-70°F, forcing roots to explore cooler substrate zones. Deeper root penetration improves transplant survival rates by 40%.
Pro-Tip: Apply 200 ppm potassium silicate solution on Day 7. Silica deposits in epidermal cells strengthen cell walls, reducing transplant wilt by 35% during the hardening-off transition.
Establishing Phase (Days 11-14): Remove domes entirely for 1-2 hours daily, gradually extending exposure until seedlings tolerate ambient conditions for 6+ hours. Leaf surfaces should exhibit minimal wilting at midday. Permanent dome removal occurs when stems develop visible lignification at the soil line.
Introduce air circulation via oscillating fans set to low speed (50-100 CFM), positioned 4-6 feet from seedlings. Gentle mechanical stress triggers thigmomorphogenesis, producing compact plants with 20% greater stem caliper.
Pro-Tip: Prune cotyledons at a 45-degree angle once the third true leaf fully expands. This apical adjustment redirects carbohydrate allocation to root development rather than maintaining non-photosynthetically efficient tissue.
Troubleshooting
Symptom: White, cottony growth at soil surface and stem base.
Solution: Damping-off disease from Pythium or Fusarium. Increase vent opening to 50%, reduce watering frequency by 30%, and apply Bacillus subtilis drench at label rates. Remove affected seedlings immediately to prevent spore spread.
Symptom: Elongated, pale stems with small, widely spaced leaves.
Solution: Insufficient light intensity causing etiolation. Supplement with T5 fluorescent or LED grow lights providing 2000-3000 foot-candles for 14-16 hours daily. Position lights 4-6 inches above dome surface.
Symptom: Brown leaf margins with upward cupping.
Solution: Salt accumulation from over-fertilization. Leach flats with pH-adjusted water (6.0-6.5) at 2x container volume. Resume fertilization at 50% previous concentration.
Symptom: Yellowing lower leaves with purple petioles.
Solution: Phosphorus deficiency exacerbated by cold substrate. Increase bottom heat to 75°F and apply liquid phosphorus (0-5-0) at 50 ppm until symptoms reverse.
Maintenance
Apply 0.25 inches of water every 48-72 hours, measuring with a rain gauge placed inside the flat. Bottom watering through capillary mats prevents leaf splash and foliar disease transmission.
Clean dome interiors weekly with 10% bleach solution (1 part bleach to 9 parts water) to eliminate algae biofilms that reduce light transmission by 15-20%. Rinse thoroughly before repositioning.
Monitor cation exchange capacity of propagation mix monthly using pH and EC meters. Optimal electrical conductivity ranges between 0.8-1.2 mS/cm for most vegetable and ornamental seedlings.
FAQ
How long should seedlings remain under humidity domes?
Most species require 10-14 days total. Remove domes when the second or third true leaf fully expands and stems show visible firmness.
Can humidity domes be reused across growing seasons?
Yes. Sterilize between uses with quaternary ammonium disinfectants or hydrogen peroxide (3% solution) to eliminate pathogen carryover.
What humidity level indicates proper dome function?
Target 80-90% relative humidity during germination, gradually reducing to 60-70% before removal. Use a digital hygrometer for precise monitoring.
Do all plant species benefit from humidity domes?
No. Cacti, succulents, and plants native to arid regions (cation exchange capacity below 12 meq/100g) often develop poorly under high-humidity conditions. Reserve domes for tropical and temperate species.
Should fertilizer be applied under domes?
Limit to 50-100 ppm nitrogen from organic sources. High nutrient concentrations combined with restricted air exchange promote excessive vegetative growth and weak stem structure.